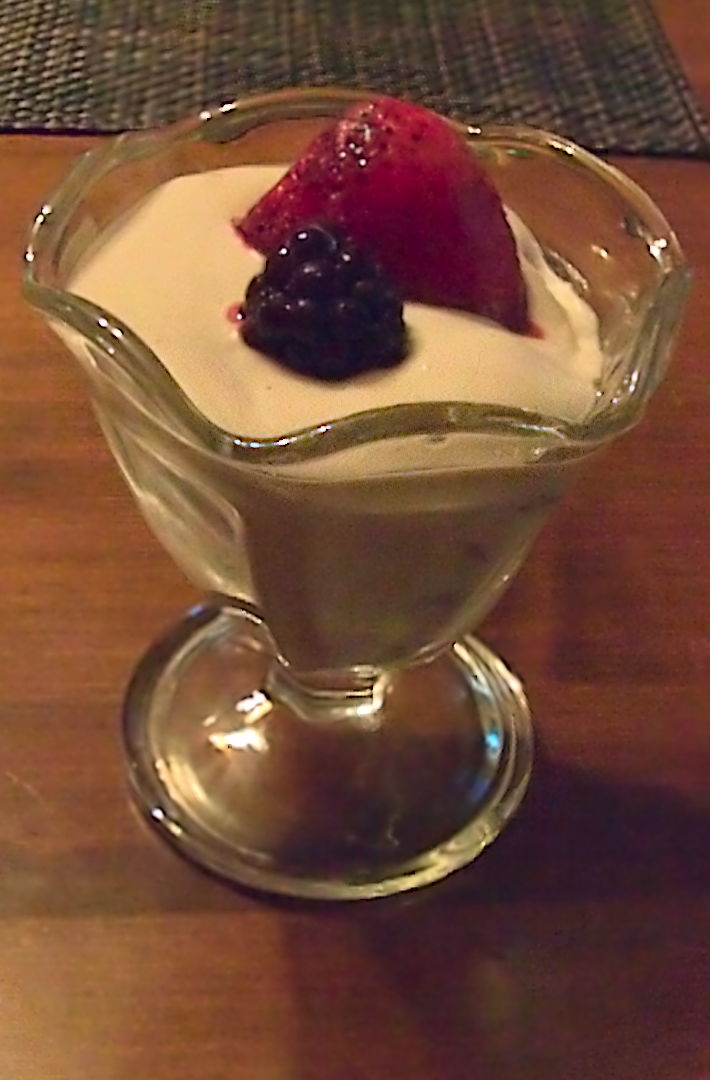
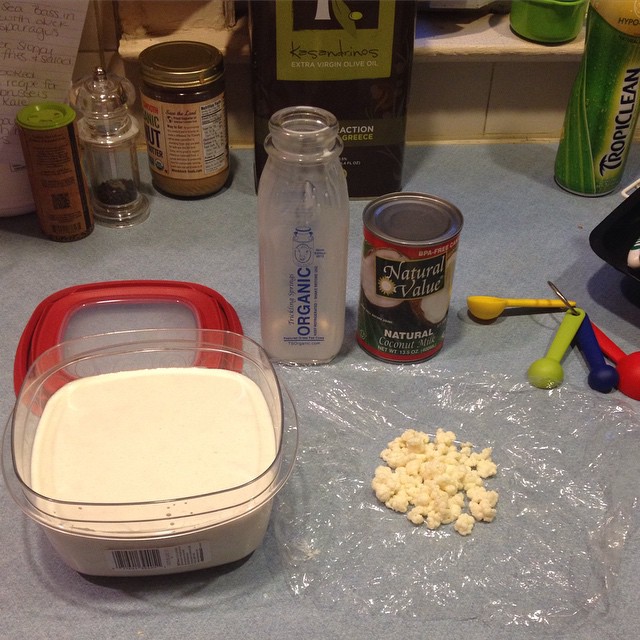
So, I’ve been wanting to experiment with fermented foods for a long time. I eat fermented foods. I’ve just never made my own, until now. I bought a book on fermenting foods about two years ago and have been so distracted, so I never tried. Someone I know had more kefir grains than he was able to keep up with and offered some to me. I took that as a sign it was time to finally try fermenting foods. I made a dairy-free kefir with full-fat coconut milk, as well as one with grass-fed non-homogenized whole milk. It is important to use full-fat milk rather than low-fat, because the kefir grains feed on the fat & milk sugar (and also full-fat is better for your health). To learn more about how to make kefir, click here. Kefir is a rich source of calcium, protein, & B Vitamins. Kefir is also a potent source of probiotics, which enhance digestion, mental health, weight management, and immunity. Kefir is known to have antibacterial properties. It contains the probiotic Lactobacillus kefiri (found only in kefir), which could be helpful against Salmonella, Helicobacter Pylori, and E.coli. A carbohydrate, called Kefiran, in kefir also has antibiotic properties. To read more about the health benefits of kefir, click here and here. Enjoy my kefir parfait recipe with any fruit you like! (I used strawberries, blueberries, & blackberries)

- 4 cups full-fat coconut milk or grass-fed whole milk
- 2 tsp kefir grains
- 1 tsp coconut sugar (only if making the dairy-free version)
- 2 cups organic fruit chopped
- 2-3 tbsp raw honey
- 2 tbsp vanilla extract
- In a large mason jar, combine the milk, coconut sugar (only if making the dairy-free version) and kefir grains
- Cover with a paper coffee filter & rubberband (or something similar that will let it breathe)
- Sit for at least 24 hours
- Strain using a cheesecloth, nut milk bag, or fine mesh strainer
- Add in vanilla extract and honey & mix together
- Add in fruit of your choice & mix together (I used strawberries, blueberries, & blackberries)
- Best served chilled